 |
 
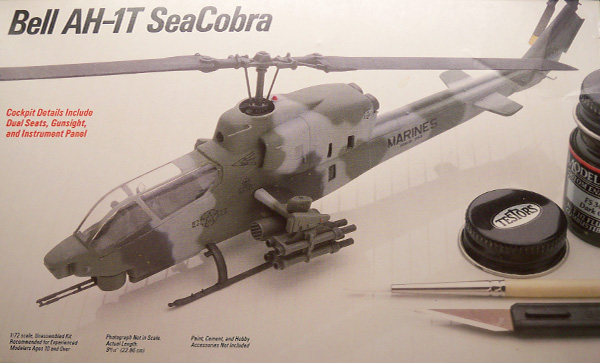
Kit: Testors #634 / Italeri #168 |

Scale: 1/72 |
Value:
This kit has been in production for decades so the price can range anywhere from $10.00 to $17.00 (US) depending on whether you find an old shelf-sitter or a brand new boxing. In today's market this is a bargain for such a good kit. |
Decals:
Decals are provided for USMC HMM 263 and HMM 268. |
Assembly:
The kit includes 60 parts molded in dark green plastic, 2 transparent parts, one decal sheet and one 8-page instruction sheet. The instruction sheet is delightfully "old school" with step-by-step written (English) instructions calling out the correct part names as well as fully labeled exploded views.
Construction begins unsurprisingly in the cockpit. The seats are shaped more or less correct although no seat harnesses are provided. Overall the cockpit is detailed well, a basic gunners sight is provided, the gunner and pilot have main instrument panels with descent raised gauges, the pilot has a cyclic and the rear bulkhead is done fairly well. Where the cockpit falls short is the omission of a collective, no side consoles or gunners sticks. I used sheet styrene and spare parts to fix. A transparent part is provide for the pilot's HUD but it is overly thick and has no frame to attach to. I created my HUD out of scrap photo etched parts and a sliver cut from a transparent sequin. A single (closed) canopy piece is provided, although it is very clear it's thick enough to distort many of the interior details.
Next is the assembly of the fuselage. The instructions call for 1/8 ounce of weight to be added to the nose to avoid "tail sitting", I used lead fishing weights and found plenty of space under the flight deck to add them. Each side of the fuselage is made up of a top and bottom piece and I found that the parts fit better by joining each engine housing to the lower half before joining the two complete fuselage halves. No engines are provided with the kit so daylight is visible through the various intakes and openings in the engine covers. I decided to solve this shortcoming by installing some unidentified jet engine halves found in my spare parts box, and by inserting a tube of styrene around the main rotor shaft. After following the directions and breaking one of the brittle skids off during assembly, I highly recommend attaching the skids last!
Next I decided to improve the exhausts. The kit's exhausts are shaped correctly, but are extremely shallow so that no amount of painting or shading will make them look like the hollow tubes they are supposed to be. I drilled out the back of the exhausts all the way through the engine housings and filled the housing with putty shaped into "pockets" to simulate the real pipes.
The last steps of assembly are the stub wings and armament. 2 x LAU-68 rocket pods are included as well as 8 TOW missiles/launchers. I drilled out the ends of the TOW tubes so they looked more realistic. Both chaff dispensers were marred with sinkholes right in the middle of the tubes. I filled the hole with putty and carefully carved out the missing details best I could using a scribing tool.
Although many of the panel lines are raised, the detail is good. Fit is good overall with some filler required at the wing roots, around the engine housings and a bit between fuselage halves. It's not a perfect kit by any means, but it builds into a very acceptable replica of the real aircraft.
|
| After Market Parts Used: None |
Customizations:
Small gauge wire was used to simulate electrical, plumbing and cooling in the cockpit and armament. Transparent pearlized sequin was used for the HUD glass and turret sight lens. Masking tape was used to create seat harnesses. Scrap styrene was used to make side consoles in the cockpit. Collective and gunners controls were borrowed from various other kits. The main rotors were twisted to simulate correct at-rest pitch. Exhausts drilled out, "engine" details added, TOW tubes drilled out. |
Research:
Modern Fighting Aircraft AH-1 Doug Richardson ISBN: 0861012593
AH-1 Cobra in action Wayne Mutza. ISBN: 0897473825 |
Recommendation:
This should be an easy build for a modeler at any skill level, and fans of small scale rotary aircraft should especially enjoy this kit. |